

The OptimizePress Theme Builder gives you full control over your site's design by allowing you to create and customize individual template parts, such as headers, footers, blog homepage, and more. Whether you're building your site from scratch or wish to fine tune your site design to be seamless between your blog posts, pages, and other content, the Theme Builder helps you control exactly where and how each template part appears.
In this guide you will learn the following:
- Where to edit the template parts
- Template editing basics
- How to Set Location & Priority for your template parts
- How to add additional rules to further control where template parts will be used.
- How to add new templates
- How to Delete and Clone Templates
- How to Export your template parts
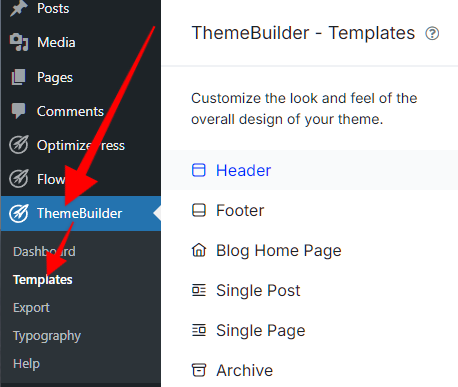
Where to Edit Theme Builder Templates
The Theme Builder Templates can be accessed under "Theme Builder > Templates" inside your WordPress dashboard.
Template Editing Basics
Lets explore the basic editing options that each template part will have.
Clicking "Edit" will open the OptimizeBuilder editor so you can customize the template part just like you would with editing pages with OptimizePress. For example, here is the Savvy Theme Header template in the OP Builder: 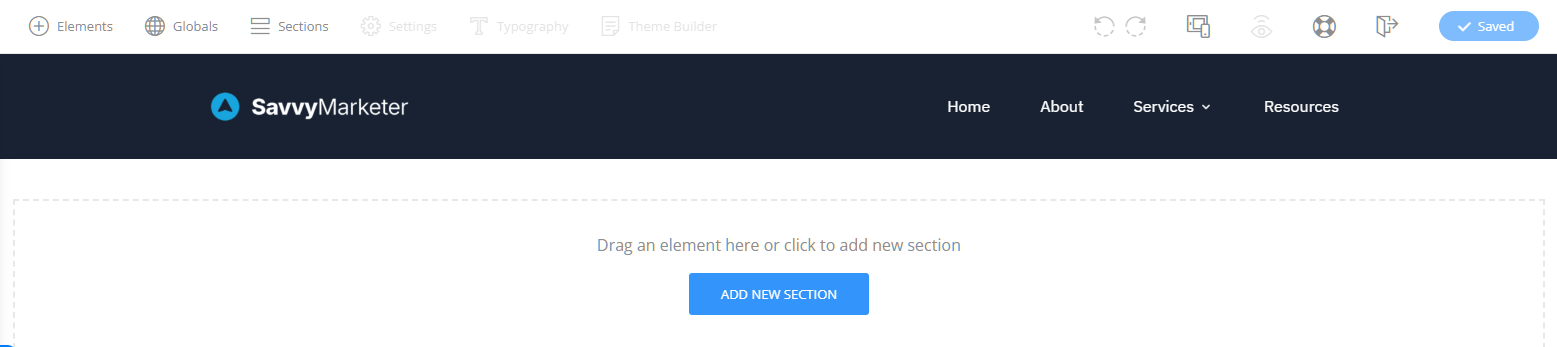
Some template parts, such as the Single Post and Single Page templates, will have extra elements that you can use to dynamically control the layouts and design of the post. You'll have the Post Title, Post Image, Post Meta, Taxonomy, and Post Content elements, all of which pull in the data from the post itself. Other template parts will not have those all available.
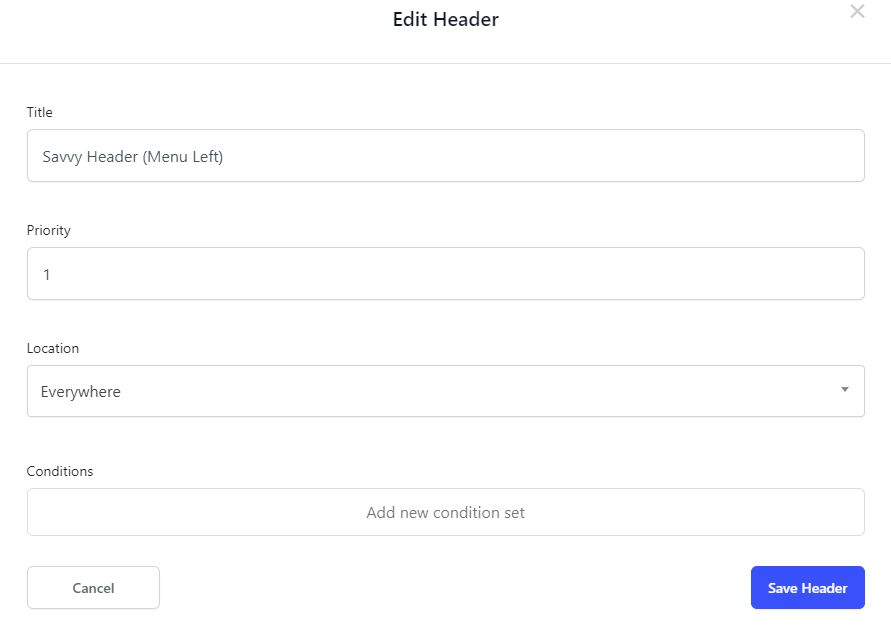
Setting the Location & Priority
Clicking "Set Conditions" will allow you to set the Priority and Location which controls where the template part is used. Again, here is an example for the header. You can see we have a priority of "1", and the Location is "Everywhere"
It’s important to understand how Priority works when you have more than one template of the same type (like multiple Headers) that could apply to the same page.
For example, let’s say you’ve created one header with the condition set to “Everywhere”, and another that specifically targets “Pages.” If both templates have the same priority value (e.g., 1), the Theme Builder will automatically favor the more specific condition. In this case, the header targeting “Pages” will be used when viewing a page.
On the other hand, if you’re viewing a blog post, neither of the templates specifically targets posts. In this case, the “Everywhere” header will be used because it has the highest applicable priority.
Remember: lower numbers mean higher priority, but when multiple templates share the same priority, the one with the more specific Location wins.
By combining Priority with Location conditions, you can build a highly customized site experience, which is something never before possible in OptimizePress.
Conditions & Rules
Condition Sets are used to further customize where your template parts are used. For example, the header template part can be prioritized and a location set, but what if you want to have a different header show up for different authors on your blog? You can do that by adding a condition like this one: 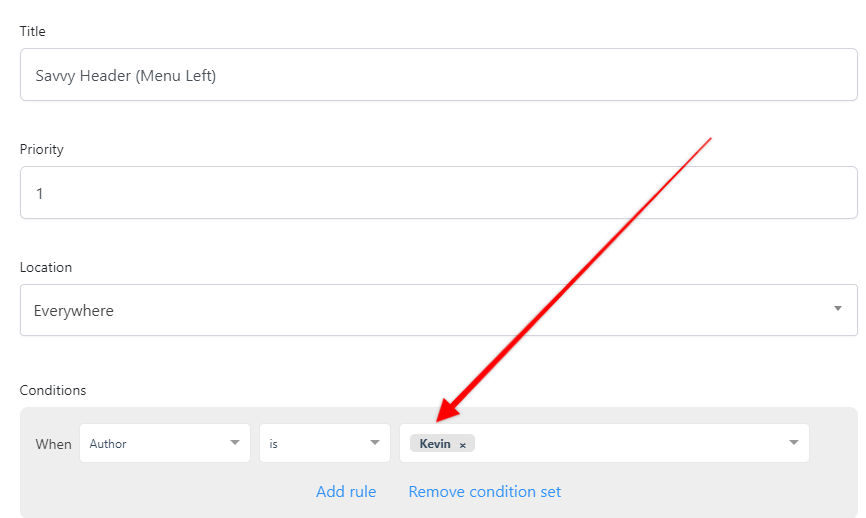
You can even take this one step further if you want to create a special header for when someone is logged in, that also meets the rule for the author. 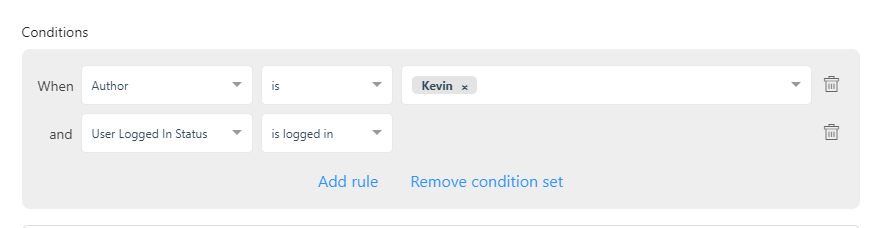 Location and conditions (and the rules there) are different depending on the templates you are editing. For example, the Blog Home Page, Search Results, and Error 404 templates do not have much customization that you can do regarding where they show up, as there is only one possible outcome for those.
Where you'll see the most customization available would be on header, footer, single post, single page, and archive templates.
If you have a relatively simple website, then there wouldn't be much need to get too crazy with these Location and Conditions rules.
If your site is complex, it's best to experiment with what would work best for you, as each use case is going to require specific kinds of set up regarding these settings. If something doesn't turn out the way you expected, just experiment with some different settings to see what works for you.
When Do Template Parts Show
If you use our page templates from the OptimizeBuilder, Funnels, or the OP3 Blank template, the Theme builder will not apply to those since they automatically use the OP3 Blank Template. So here is where these templates parts will be used.
Header & Footer template parts - Only when you use the OP3 Full Width template, or Default Template.
Single Post, Single Page - Only when using the Default template
Blog Homepage - This always shows as the posts page as set in WordPress Settings > Reading
Archive page - This always shows when viewing an archive of posts
Search Results - This always shows after searching the site. We recommend using the Search Box element for helping your visitors find what they are looking for. After they search, the Search Results page will show.
Error 404 - This will show anytime someone visits a dead link on your site (a non-existing link).
If you need to know how to change between the OP3 Blank Template, OP3 Full Width, and the Default Template, I would suggest checking our guide on that topic.
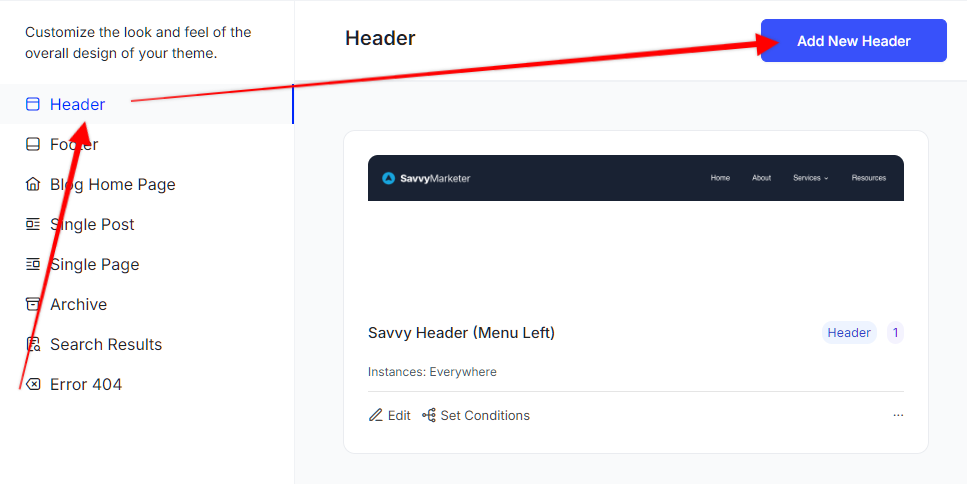
How to Add New Templates
If you wish to add new templates, you may do so by clicking the blue button to add a new template. For example, if you wish to add a new Header template, click on "Header" and then click "Add New Header"
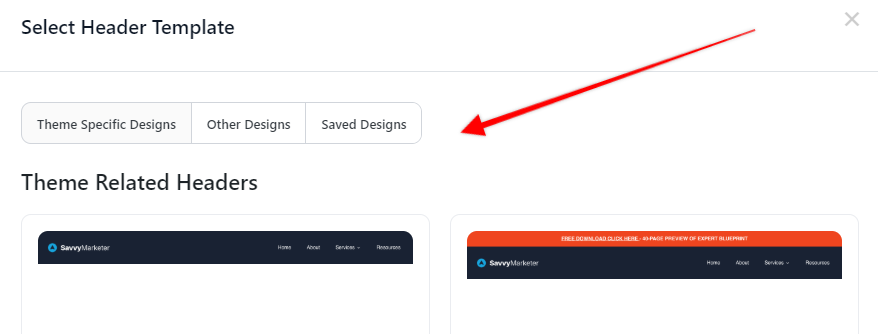
You can then choose a Theme related header, or from other designs, or from your saved (exported) templates.
Once you make a choice, the new template will be added, and you can then edit the template, and choose your location, priority, and condition rules.
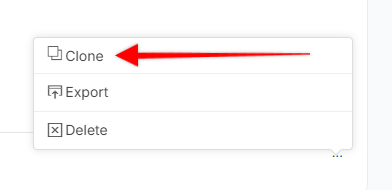
How to Delete or Clone a Template
You can easily delete or clone a template part by clicking the 3 dots on the bottom right corner of the template.
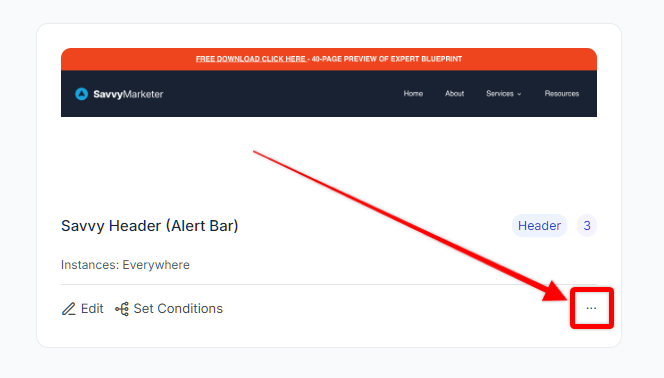
To delete the template, just click "Delete"
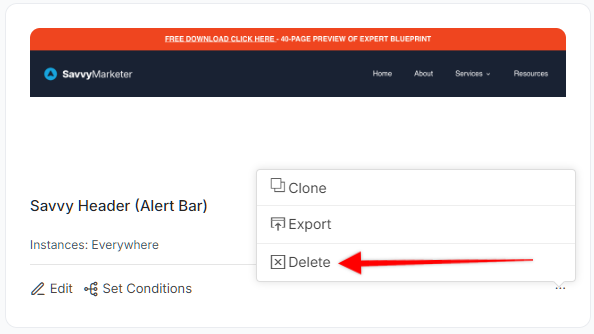
Then click "OK" to confirm that you want to delete it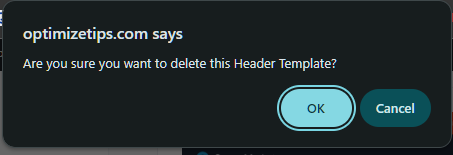
To clone a template, just click "Clone" to clone the template (instead of "delete").
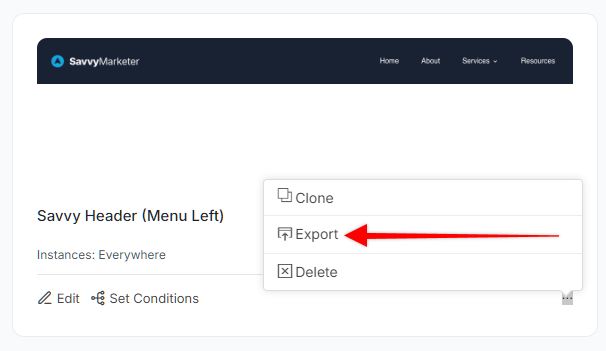
Export a Template Part
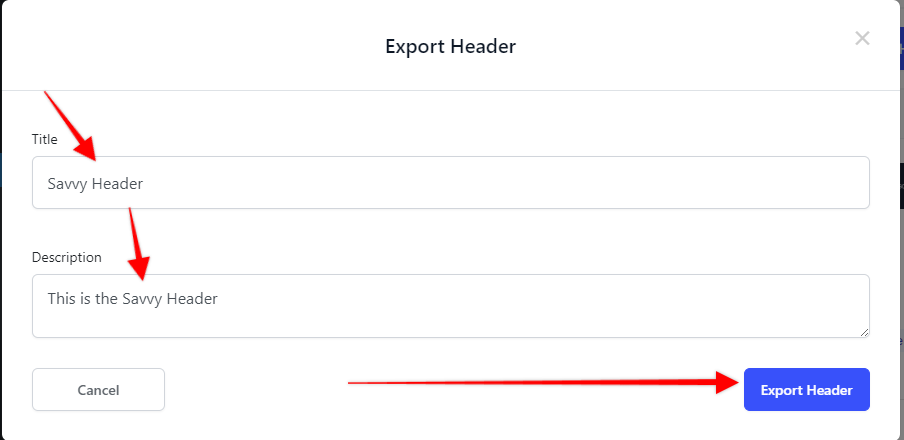
If you wish to Export the template part, click the 3 dots as shown above, and then choose "Export"
In the popup, give your template part a name and description, and then click "Export" like you see here (note that each template part would have its name, like "Export Header" or "Export Footer" etc.).
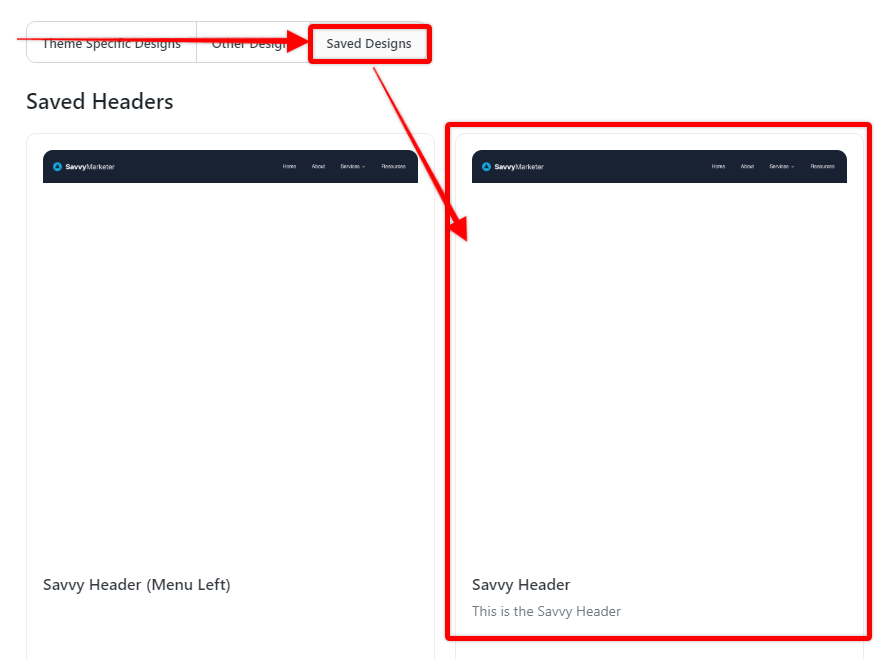
The template part is saved on your site within the "Saved Designs", which are available when you add new template parts.
If you wish to export these designs to the personal template cloud, you would open the editor and export the section.
You can also export your entire Theme Builder Theme if you want to make it available for other sites of yours.
Frequently Asked Questions
1. What happens if multiple templates match the same page?
When more than one template (of the same type) matches a page, the Theme Builder uses the one with the highest priority (lowest number). If two templates share the same priority, the one with the more specific condition will be used.
2. Why isn't my new header or footer showing on the site?
Make sure the template has Conditions set to match the page you’re viewing, and that its Priority is higher (lower number) than other templates that could also apply.
3. Can I have different templates for different post types?
Yes! You can create different Single Post or Archive templates for custom post types and assign them using Conditions.
4. Can I preview what conditions are applied to each template?
Currently, you’ll need to open each template and check the Conditions panel manually. Consider using clear naming (e.g., “Header – Posts”) to keep things organized.
5. Why can’t I create more than one Blog Homepage/Search/404 template?
The Blog Homepage, Search Results, and 404 templates are limited to one instance because WordPress only allows one of each. You can still edit and style them, but you won’t be able to create multiple versions.
6. Do changes I make to templates affect live pages immediately?
Yes. Once you save changes in the OptimizeBuilder, they are applied live to any matching pages unless you’re using a staging environment.
Troubleshooting Tips
My template isn’t displaying on the front end, what should I check first?
- Double-check that the Conditions are set correctly.
- Confirm that Priority isn’t being overridden by another template with more specific conditions.
- If using caching plugins, clear the cache and refresh.
My header/footer shows on the wrong pages. How do I fix this?
- Review your Conditions and Priority. You might have a more general template (like “Everywhere”) taking over due to a higher priority.
- Adjust the priority or narrow the location of the general template.
I updated my template, but changes aren’t visible.
- Try clearing your browser cache and any site caching tools you’re using.
- Make sure you clicked Save in the OptimizeBuilder before exiting.
- If you’re using a CDN, purge that cache too.
Why is my template not applying to a custom post type?
- Ensure the custom post type is selected in the Conditions panel.
- If it’s a plugin-generated post type (like a course or product), confirm that the plugin is active and that the post type supports templates.
If you need additional help or tips about using the theme builder, please reach out to our team and they'll be happy to help.