In this tutorial, we're going to cover the Email Settings inside the OptimizeCheckouts settings area.
The email settings will contain your email information that customers will see when they're set information about their order through email.
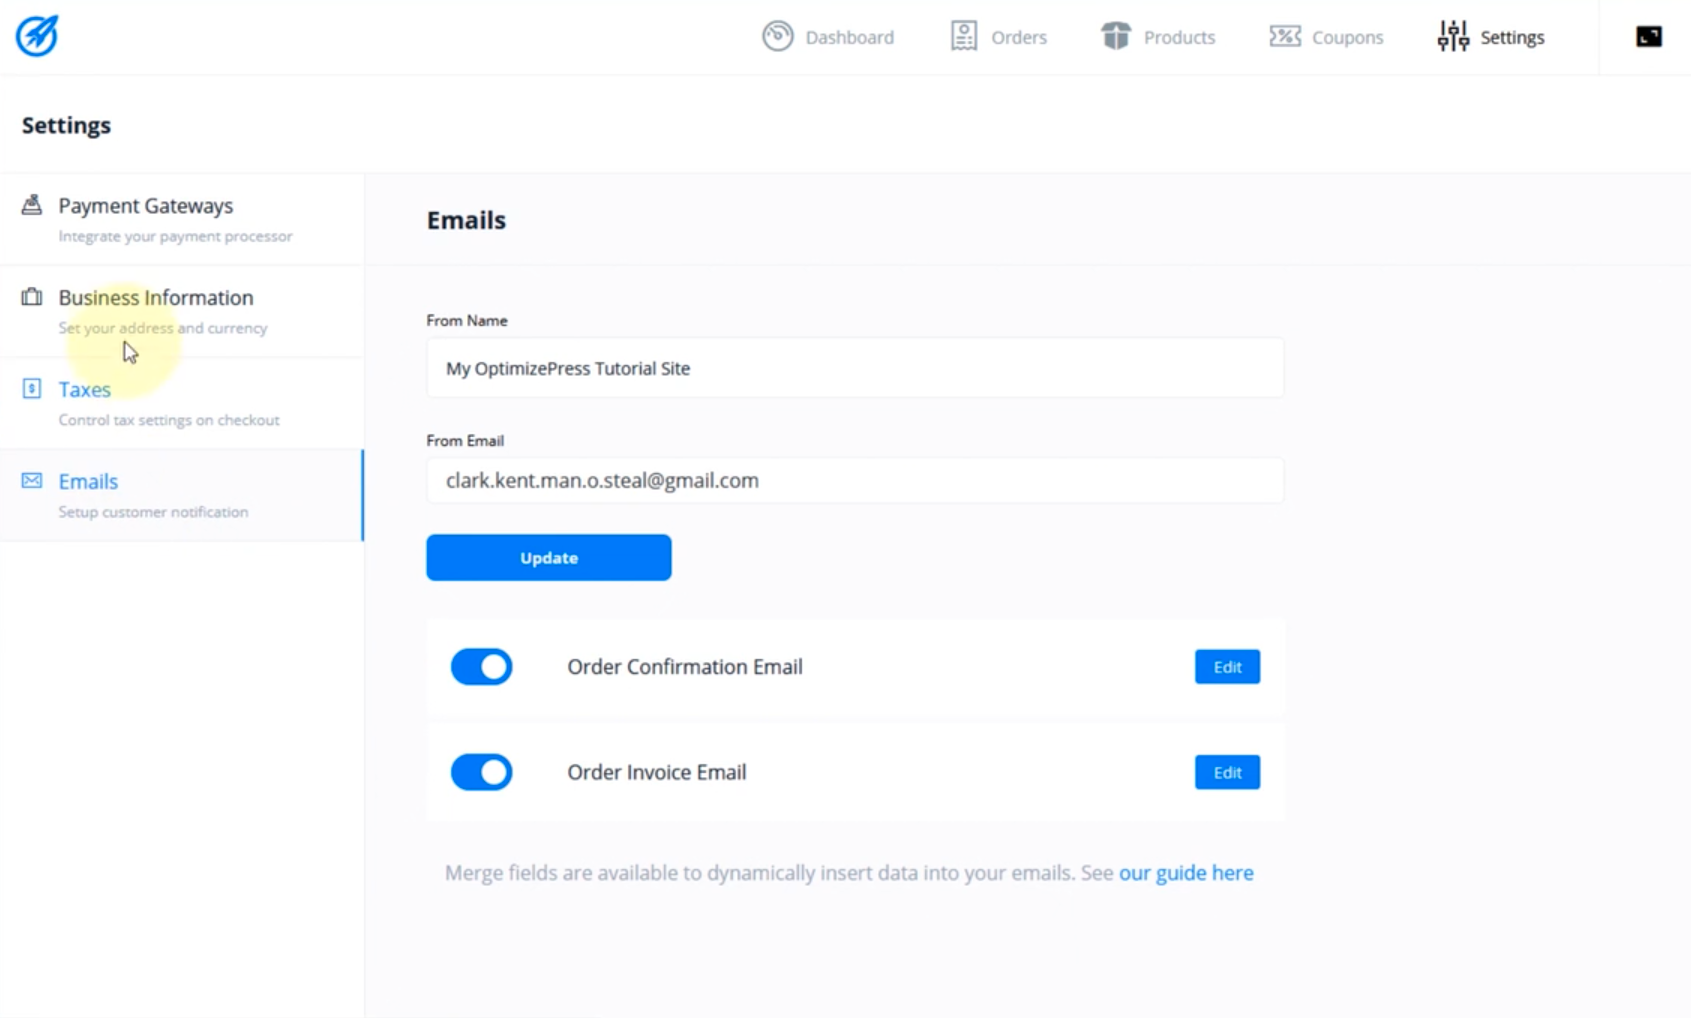
To find your email settings and begin setting this up, go to OptimizeCheckouts > Settings and click on the Emails tab.

You will be shown fields containing the From Name, which should be set to your Company Name, and the From Email address, which would be the email that will send the automated emails.
Please Note: To prevent your emails from being sent to your customer's Spam or Junk folder, we strongly recommend that the email address used is the same one used for your WordPress Admin email address.
The Email Settings area will also include toggles for your Order Confirmation and Order Invoice emails, which automatically get sent to customers upon purchase of a new product.
Clicking on the Edit button for each will reveal the email content that will get sent, which can be customized to suit your business requirements.
Order Confirmation Email
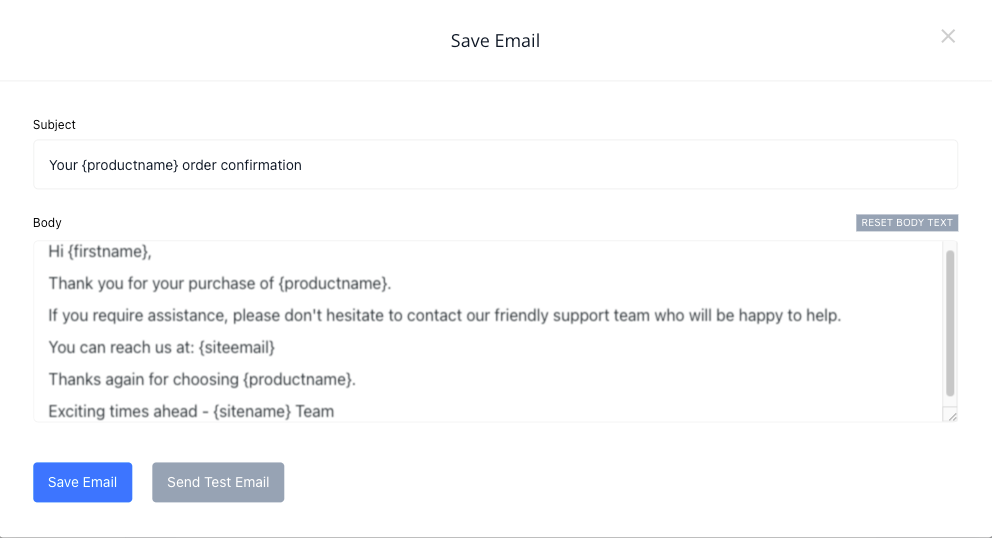
The Order Confirmation Email edit area will look as follows:

Included in the email template are merge fields, which you can add to the default template.
For a complete list of merge fields, please refer to the KB article below:
OptimizeCheckouts Email Merge Fields
Order Receipt Email
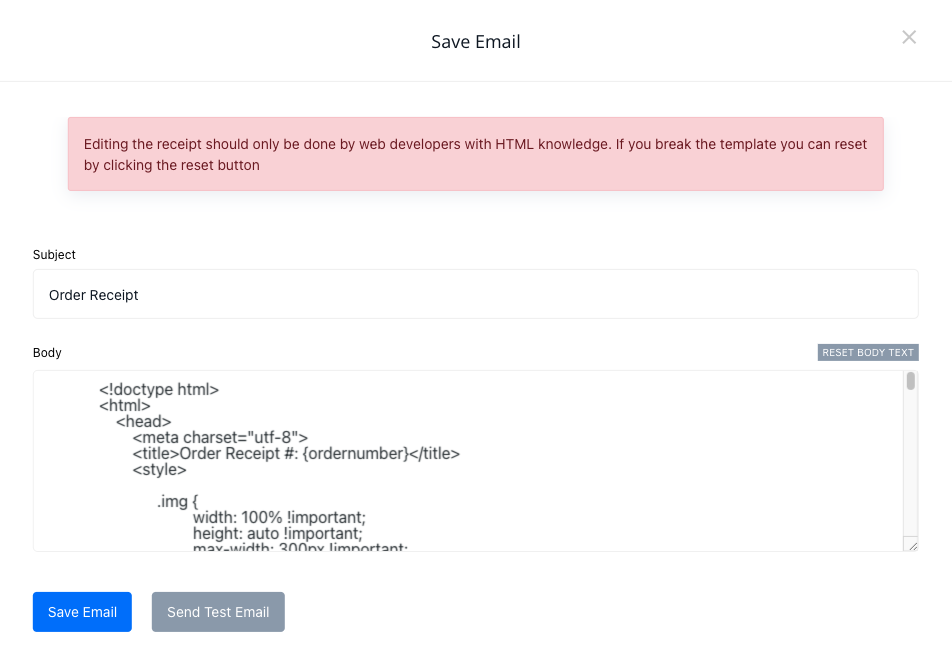
The order receipt email will be the receipt customers will receive on purchasing of your product.

By default, the email will send the receipt in the form of HTML, which you can copy and edit.
Please Note: If you're not experienced with HTML, we recommend hiring a developer or an HTML coder.

